In cases where your printer is printing light or light on one side of the page you may have a dirty/dusty laser unit. This can be fixed by cleaning the mirrors and the polygon mirror surfaces.
This is a quick guide on how to clean a laser unit. It applies to the Brother HL5140 but you may adapt this guide to suit most mono desktop laser printers.
Tools required are a number 2 phillips screw driver, lint free dusting cloth and some technical know how which we’ll try to help you with in this article.
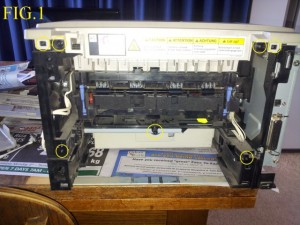
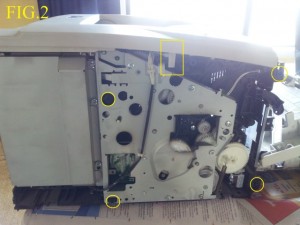
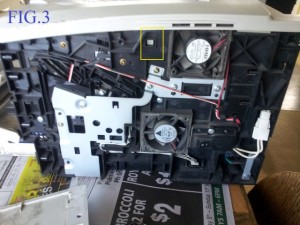
- First you will need to remove the side and back cover (for screw locations see Fig.1, 2 and 3)
- The top cover can then be removed by lifting the rear upwards while unclipping the side clips (see Fig.2 and 3 outlined by rectangles). You may also need to remove the display/keyboard connector.
- Once the top cover is removed the laser unit is clearly visible and can be easily accessed by removing the two gold screws holding the laser unit cover.
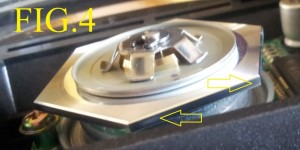
- With the cover removed you will have access to the polygon motor and some of the mirrors and lenses (the rest of the mirrors are on the under side of the laser unit and can only be accessed by removing the laser unit from the printer completely).
- I personally find that a soft cotton bud is very useful for gently cleaning laser units, but any soft lint free cloth will do.
PS: make sure not to scratch the mirror coating! All laser units use surface coated mirrors which means the coating is NOT protected by a layer of glass like normal mirrors.


Nice article. I hope you can do the same topic with the DCP-7065DN. Thank you.