Hi If you have a Kyocera Ecosys FS1000, Ecosys FS-1000+, Ecosys FS1010 or Ecosys FS-1010+ laser print that has dirty prints like the sample shown below you have a worn/old drum cleaning blade. 
To fix this fault you will need to replace the blade with a new one.
You may also note that the printing is off the page a bit – this is another common fault with Kyocera (and others) printer that are older than 10 years. The fix for this fault is found here.
FYI: Kyocera never released this part as a single item but they are available after market.
- Remove the drum unit and toner from the printer
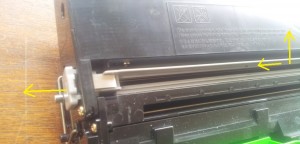
- Remove the charge unit from the drum. This is done by unclipping the cap on the left side of the drum and sliding the charge unit slightly left till it stops and the lifting the right hand side up and out.
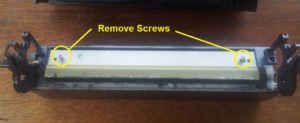
- Remove the screws holding the side caps to the drum unit and then remove the side caps (one on the left and one on the right).

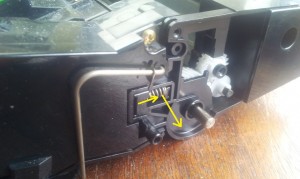
- Remove the clip and spring that holds the drum and developer/toner unit together.
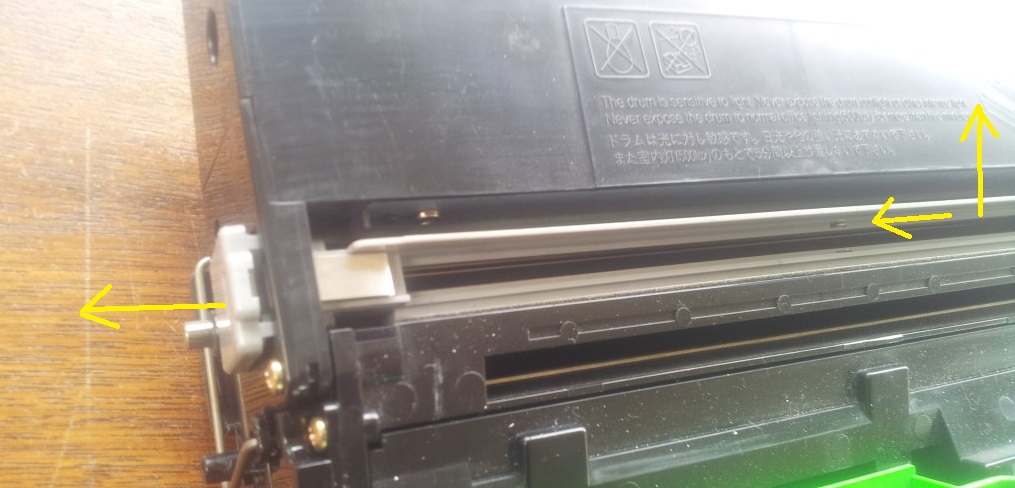
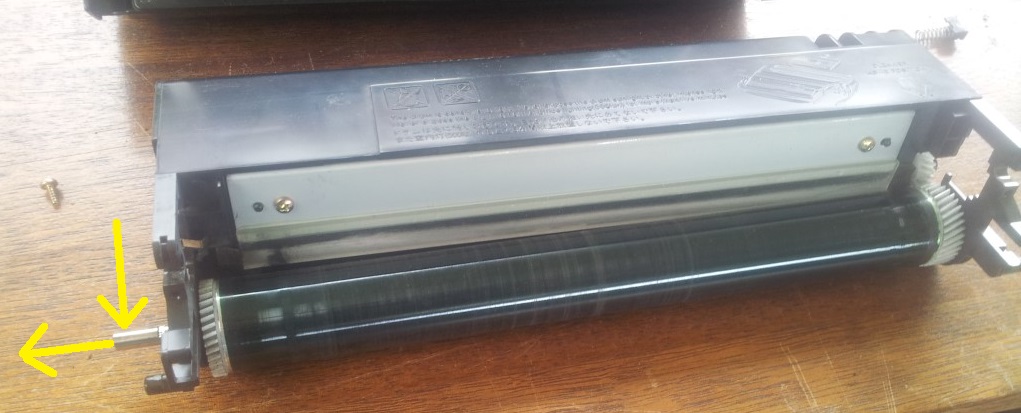
- Remove the drum shaft and drum – pop the shaft on the left hand side of the drum unit towards you and side it out.

- Remove the drum cleaning blade.
- Replace the drum cleaning blade with a new one and re-assemble in the reverse order.
- If you have completed all of these steps correctly your Kyocera should now be printing clearly.


If you find this article useful or have a question please leave a comment!
Thank You very much for the hints. I could easily exchange the cleaning blade (and the drum itself) from a surplus printer though Kyocera’s manuals always just recommend ‘change drum unit’ and do not show any disassemly information. Saved me quite some money!
this information is really simple and easy to comprehend. i will like suggestion on how to permanently fix none Genuine toner rather than always holding OK and STOP key simultaneously thanks.