If you have an old Kyocera Ecosys FS1000, FS1000+, FS1010 or FS1010+ that does not print in the right position on the page, you could have sticky registration or feed solenoids.
This is an easy -ish fix that requires a small amount of tech skill and a number 2 Phillips screw driver.
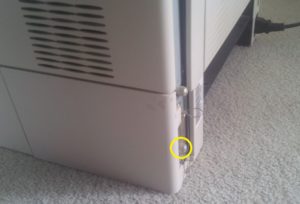
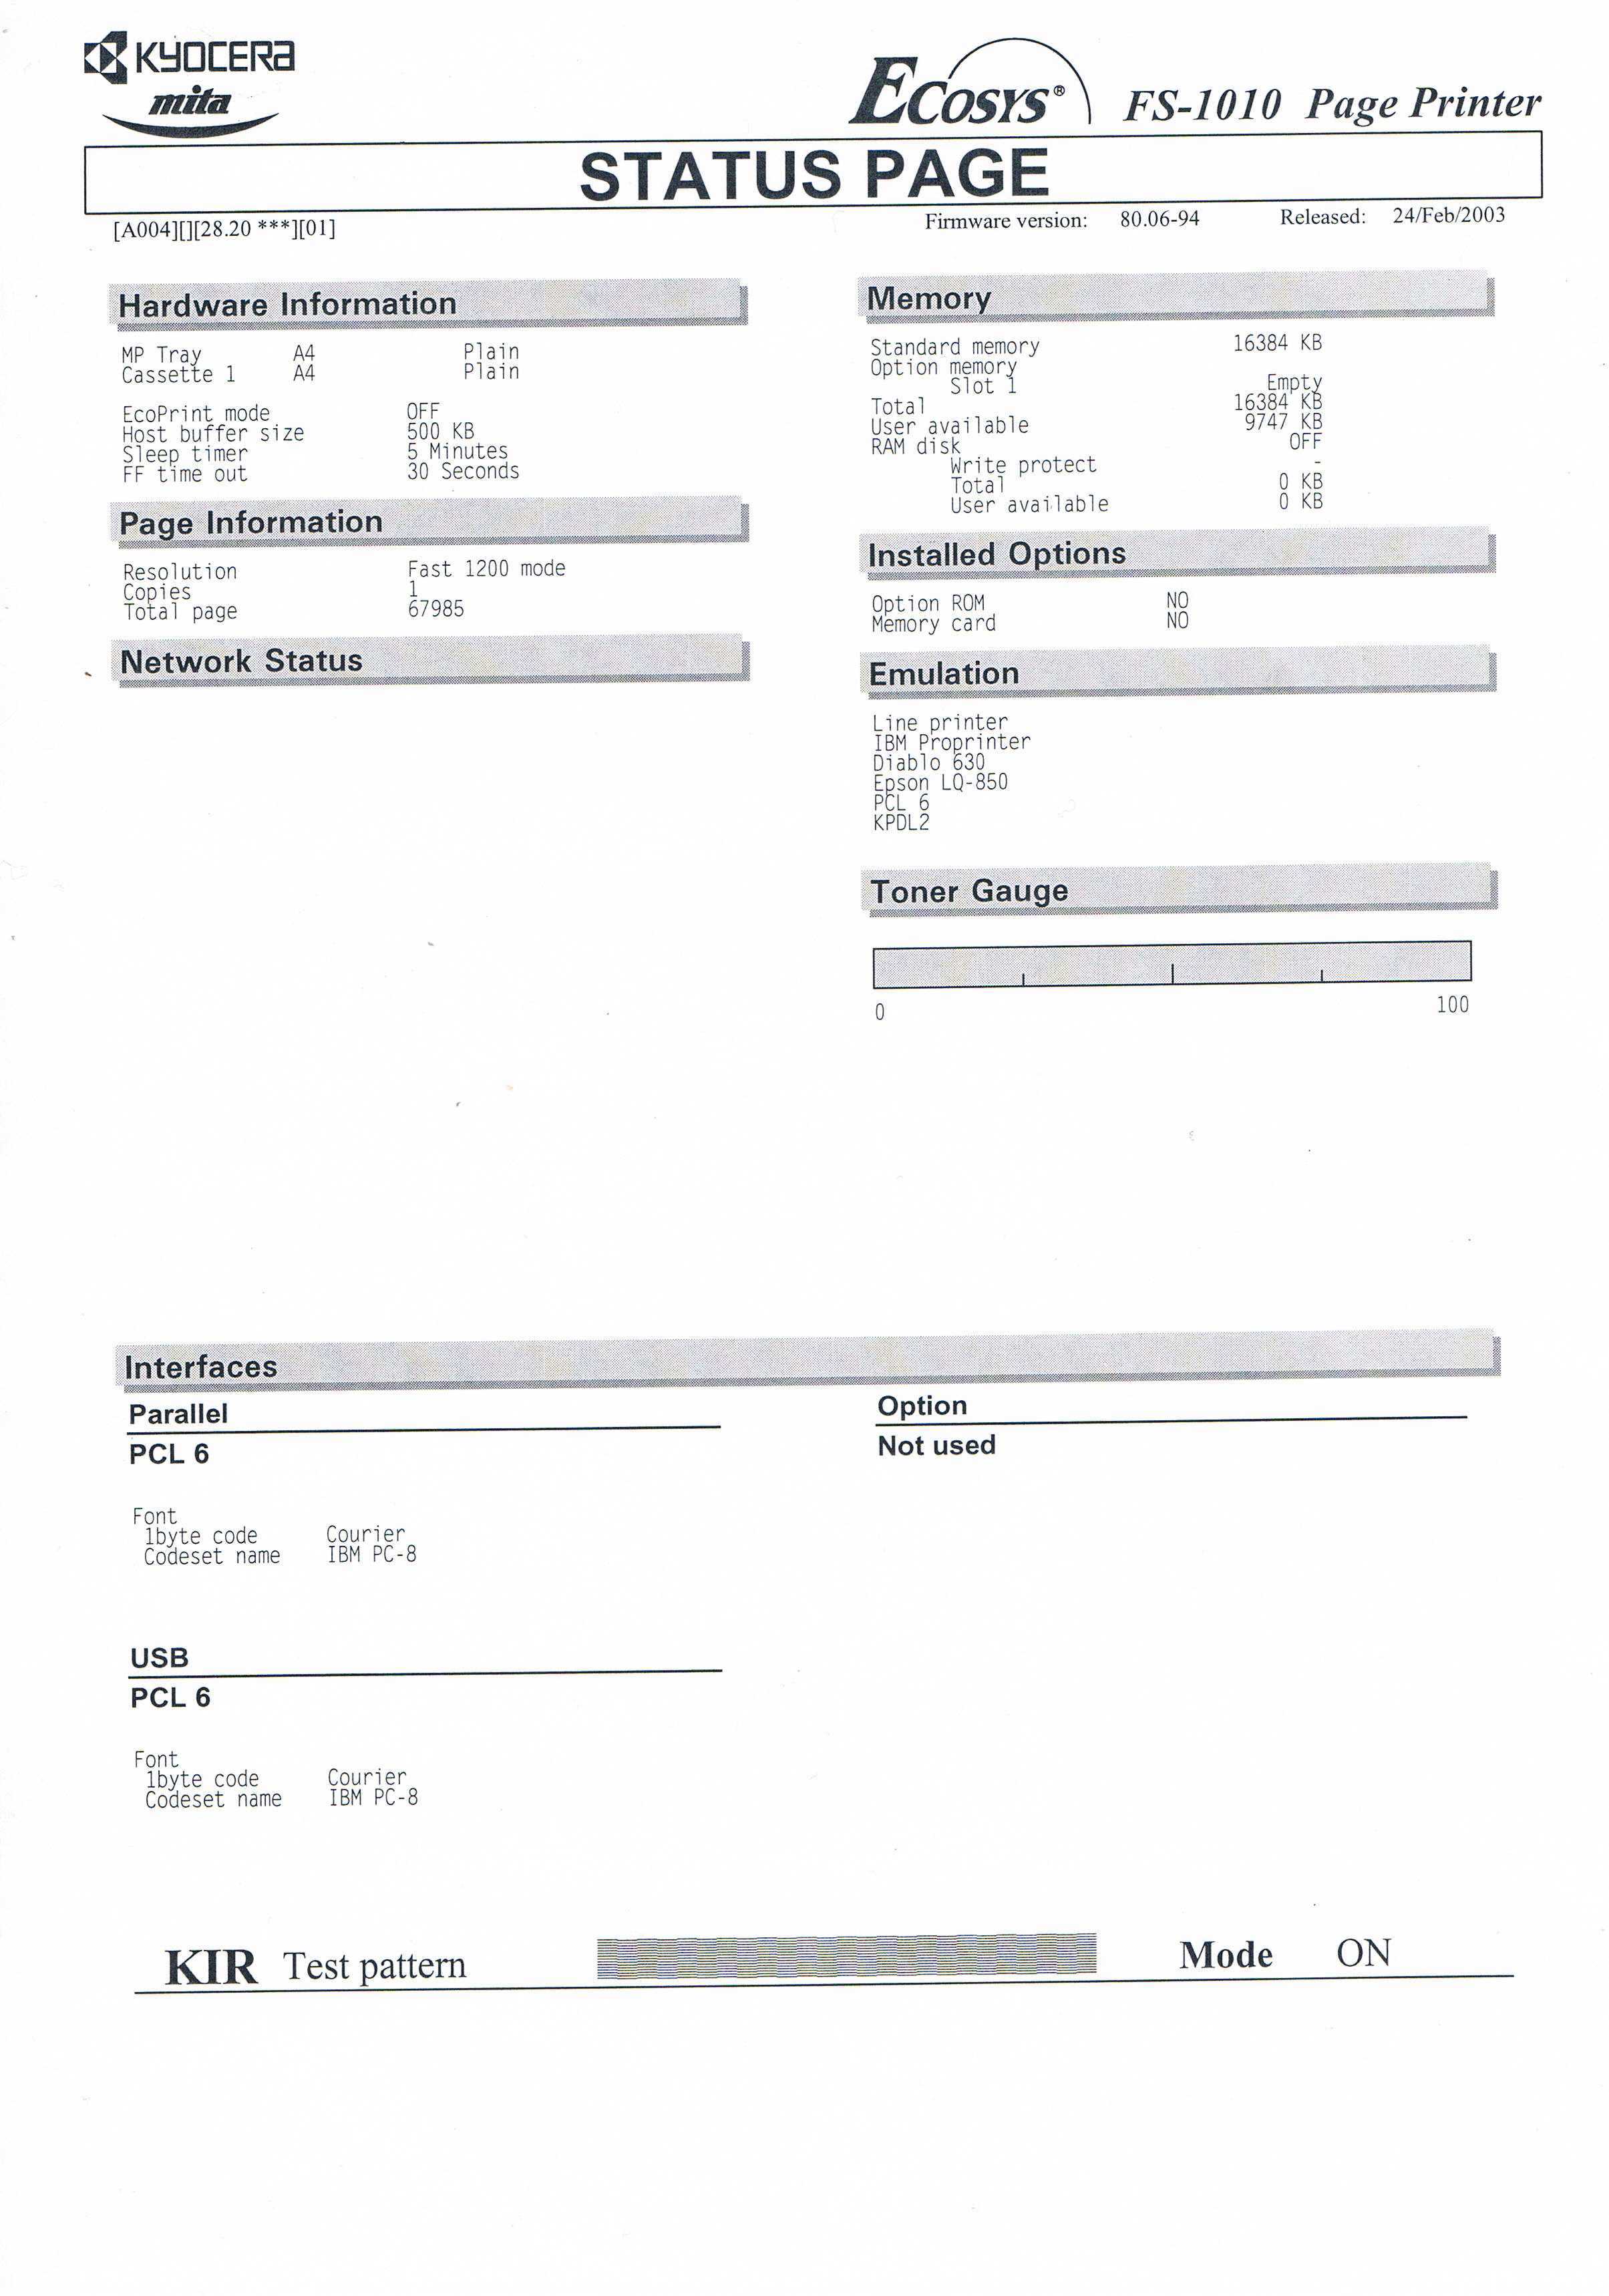
First check the sample bellow to compare the fault you have to the fault this article talks about.

Note: that the print may start very early to very late on the page.
To fix the timing problem please follow the guide bellow
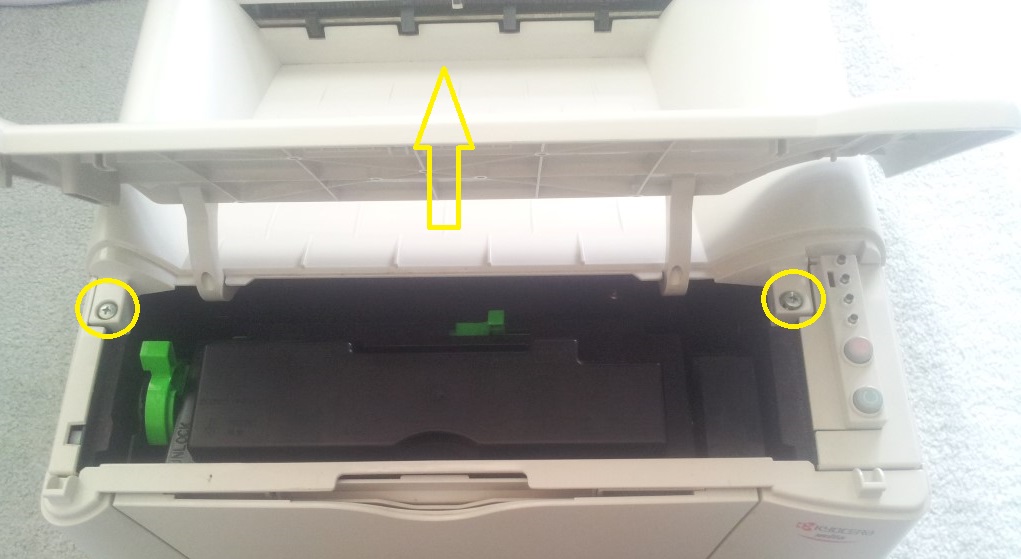
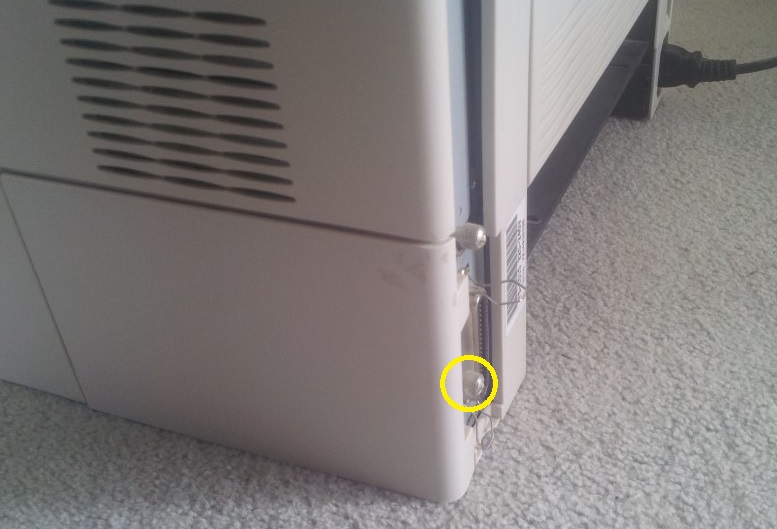
- Undo the 2 screws holding the top cover on an remove it.

- Remove the memory cover plate (on the right side of the printer).
- Remove the right hand side cover.

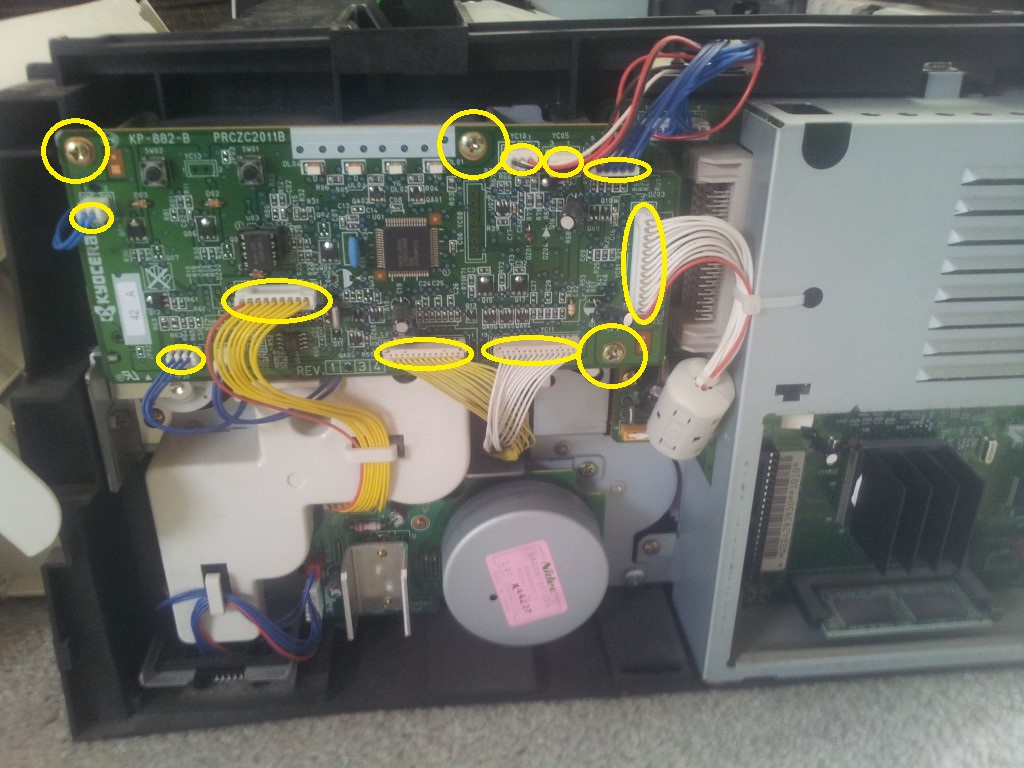
- Disconnect the pcb plugs and undo the 3 screws holding it in place.

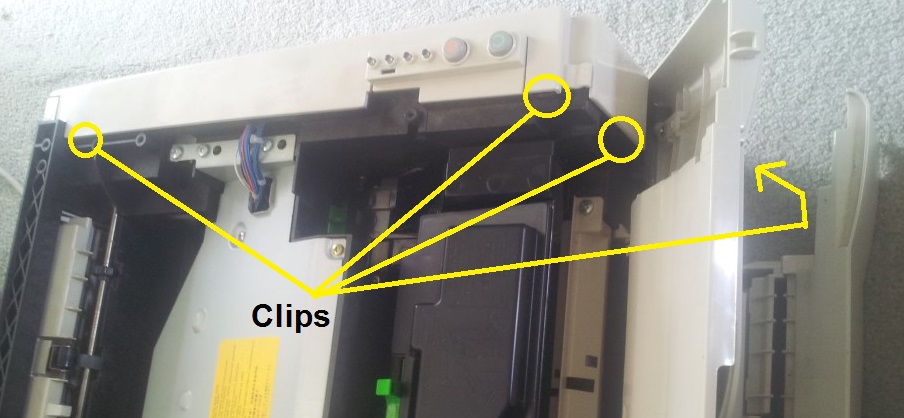
- Undo the screw holding the gear cover plate and remove the plate.

- Remove the solenoids.

- Unclip the spring from the solenoid and remove the latch plate.
- Remove any foam from the solenoid INCLUDING the glue that sticks the foam on to the metal.
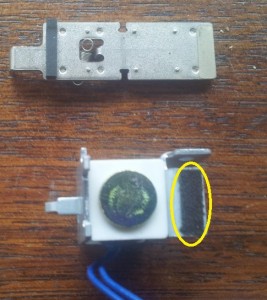
- The registration has 2 lots of foam and usually both will need removing. One in on the solenoid and the other is in the printer its self.

- Rebuild the solenoids and refit them to the printer.
- Refit everything in reverse order to the disassembly.
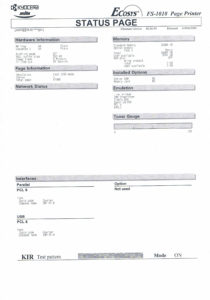
- Do a test page.


Thank you! Saved me junking a perfectly god printer.
One comment: On first attempt I could not remove all traces of glue (lacking a suitable solvent). This proved not good enough, so then put a piece of self adhesive paper label in place of each felt pad. Now works perfectly – time will tell for how long, but should be good indefinitely (?)
Grazie mille, thank you!
Hello,
excellent, works Fine,
Regards BTS.
Brilliant, this fix has save me skipping this workhorse printer. Make sure you remove all the pads and the sticky residue! 🙂
Hi everybody, Wanted to know if this fix works on a Kyocera FS-1118MFP Ecosys.
Hi Sud
I actually just fixing my FS-1118MFP following those directions. The insides of the machine are nearly exactly the same, the only significant difference is opening the panel, which you can find explained in this pdf: https://download.datec-gmbh.de/Technik/Kyocera/FS-series/FS-1018MFP_1118MFP/servicedocu/FS-1118MFP_SM.pdf
Good luck!
I can confirm, that this fix has helped me with FS1118MFP. Thanx!
Worked for me too. The issue is the noise deadending foam pads deteriorating over time and turning to goo. That delays the release of the solenoid and so upsets the registration. I suspect only the paper registration solenoid needs the treatment, apart from making the printer a bit noisier there is no harm doing the others as well.
it works. i have fixed mine
Thanks a lot!!! Just now repeared my Kyosera 1010. All OK now. Just one tip – do not make a problems with changing one glue to another. Simply remove old foam and put there heat shrink tube instead. I did it with 2 rings of tube – one to lever and second to coil part.
Kind sir, Thank you very much! 🙂
Fixed my FS-1000 with this information
Great instructions. Easy to follow. Only had to do Registation and Tray feeds as the Manual Feed has never been used so needed no fixing as foams looked like new.
The old foams on the solanoid side (Looked like sponge) had worn through and the glue holding the foam was sticking to the latch plate.
BIG-BIG THANKS!! Thanks to this, i could repair an old Kyocera FS-1020D. The problem was, exactly this print on top, and paper jam after every 2-3, pages. ( I think because that slides become larger and larger)
Success on the 1020D. Had to pack the cleaned solenoid base plates with a few layers double sided tape (surface layer retains protective backing) to get the metal tabs within the magnet’s attraction range. In retrospect I think Vadim’s heat shrink idea is a good approach. Thank you EasyInk Support for helping me keep a perfectly good printer running!!!
About the problem withe the solanoids of the FS1010 printer: I got two FS1010 printers for free. But when when I make a test print it starts halfway the page and another test print is ok. Maybe the same problem? Do I remove the solenoids, clean them or should I replace them? Thanks in advance.
I would just remove the sticky foam and call that done (clean them).
I was about to throw away my FS-1010, when I read this advice (thanks to a top hit on the Google search engine). The instructions were easy to follow and the printer lives to work for a bit longer.
My experience was that just removing the 4 pads and cleaning off the old glue wasn’t quite enough to fix the printer. I had to use small pieces of cardboard (from a Kellogs cereal box, fixed in place with UHU) in place of the discarded felt pads. After that it all worked a treat. Thank you for posting the very helpful article – and my printer is grateful too.
This worked perfectly but required two tries. The tray feed solenoid (the bottom one) remained sticky even after what I thought was thorough scouring & cleaning. I bent the strike plate (on which the removed pad had been mounted) to minimise the area of contact. That did the trick.
Sure, the solenoids are a little ‘clicky’ now but the printer is back, literally working as well as when I bought it.
The repair is easier than it sounds. All you need is a PK screw driver, strong fingernails or light grips for removing plugs from the circuit board, a pocket knife & some solvent. Oh… & patience with fiddly plastic clip-on panels.
Recommended.
Thank you! This solved the problem with my FS 1030-D, the other solution would have been a new printer.
Doesn’t look like the design has changed since the earlier models – and it’s been a good, solid workhorse.
My printer behaved exactly as you described. When I first checked the solenoids manually, I had the impression they weren’t sticky. I was wrong. The levers only start sticking when you press hard enough. The solenoids have quite some force. I followed your instructions and now my printer is functional again. Thank you very much!
Thank you so much. This saved a wonderful workhorse printer. It didn’t work from the first time when I just removed the foam. I had to “restore”the foam pads using double sided thick tape and electric tape over it. This did the trick. Guess the problem was from the damaged foam pad on the lever of the registration solenoid. It keeps the lever close enough to the magnet so that it could actuate it. Probably it would have been enough just to restore it but I decided to fix all pads so that the solenoids work quieter and avoid one more possible disassemble/assemble.